Rendering variants and ASP.NET
This nice feature of rendering variants in Sitecore XM Cloud can also be used with ASP.NET Core SDK
SitecoreSitecore XMXM CloudComposableHeadlessSitecore ASP.NETdotnet
| Reading Time: 7 Minutes, 5 Seconds
2025-05-16
Rendering variants is a nice feature in Sitecore that allows exposing a component in different visual representations and let the editor choose among those.
It can be used for simple variants - like if a certain field should be shown or not, should the image be placed to the left or the right, etc. But it is a different markup so it can be even completely different like should the items be presented as a list or a slider. It is a way to reuse the data and the logic from the component but easily switch between different representations.
For historical context, it was introduced back in MVC based SXA. It has previously allowed editors to dynamically “build” the variant by adding content items to represent various markup elements, and there have been a templating system to dynamically define the view from content1. As within several other areas, I think that the headless SXA have found a way better balance for an enterprise solution keeping the site performant and consistent while still maintaining the flexibility for the editors.
Sitecore configuration for rendering variants
No matter the actual technology used to implement the head application, the configuration in Sitecore to make the variants available are the same.
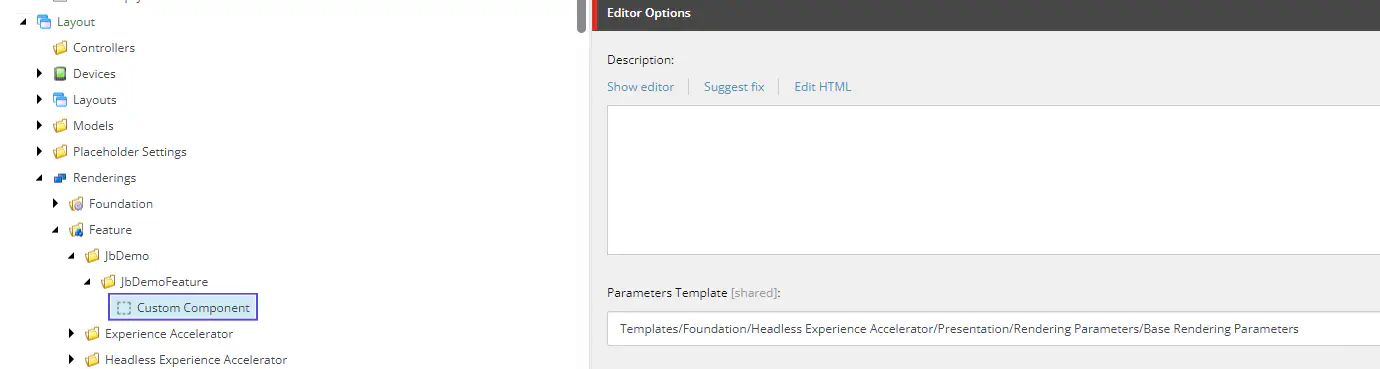
Headless Variants is actually implemented in a Foundation module, so technically you need to add this module to your site. However, it is enabled by default and the only action happening during installation is that “Headless Variants” root node is created within the presentation section of the site.

To define that a component have variants you will create an item with the built-item templates to represent the component and the variants as children. For consistency you can on the component representation add “Compatible renderings” with an actual reference to the item defining the component JSON rendering. If the field is left empty there will be some “magic” matching based on name, so here it was actually not necessary - but I like to have actual ID references.
It is also important that the rendering uses a Parameters Template that contains the relevant fields. The documentation states that you should use the “copy rendering” powershell script to create new renderings. For our case, and very often, it is enough to use the Base Rendering Parameters for Headless Experience Accelerator components.
Rendering variants using the (traditional) Next.JS SDK
In the javascript based Next.JS SDK it is very simple to implement the variants in the same .tsx og .jsx file as individual components/functions and export those. It is ok-ish described in the documentation for JSS2 and a bit cleaned in the new Content SDK3
When you are not using variants you will either:
-
use export default like
export default withDatasourceCheck()<ContentBlockProps>(ContentBlock);4 -
use named export but with the name
Defaultlikeexport const Default = (props: PromoProps): JSX.Element => {5
To export additional variants you will simply export the additional components/functions as eg. export const WithText = (props: PromoProps): JSX.Element => { (the Promo component in the headstarter actually have an additional Rendering Variant implemented6)
Often the component builder is used to generate the map of components, but at least this will just be all the exports and the component factory in the SDK will then make sure to invoke the right function based on the variant selected by the editor.
Rendering variants in the (new) ASP.NET Core SDK
In the new ASP.NET (Core) based SDK for modern .NET 8 development, the rendering variants are not handled as such in the SDK but with a bit of insights to the rendered layout, we can very easily handle this.
Let’s fire the layout request in the GraphQL playground
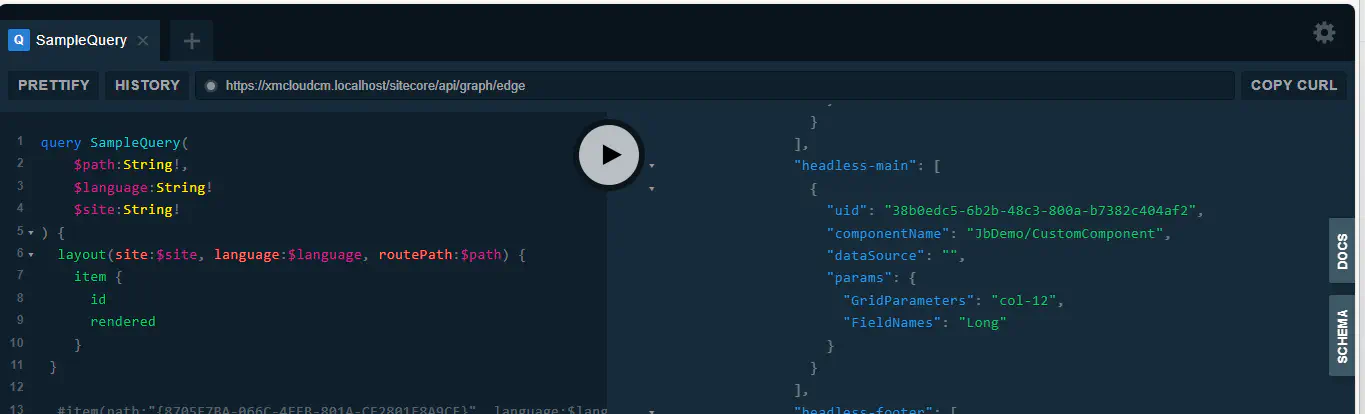
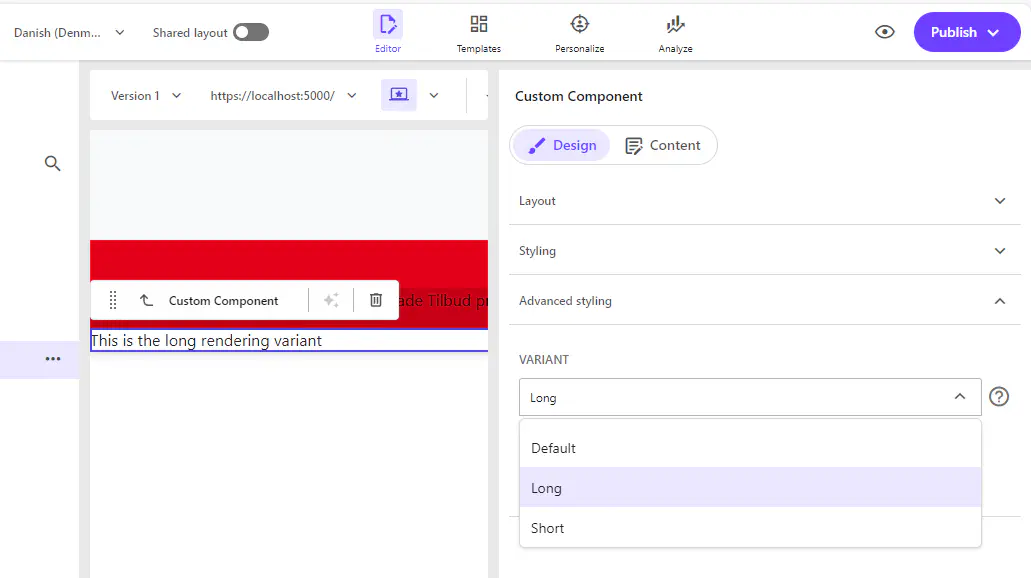
In the layout response we can see that there is a rendering parameter (in the params object) with the name of my selected rendering variant in an attribute called FieldNames.
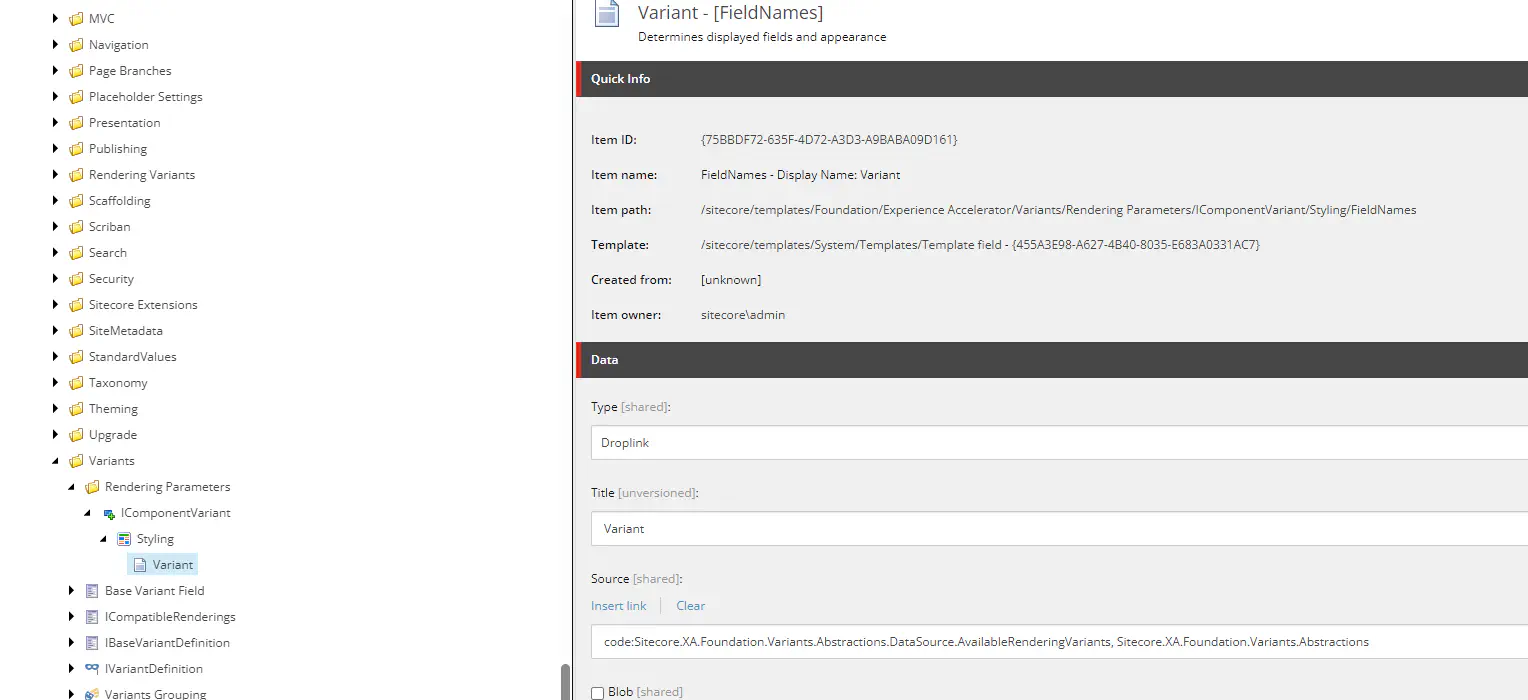
We could also have found this field in the Rendering Parameters template mentioned above. In inherietence we would see the field called Variant from a template within the Variants feature module. However, “Variants” is just the displayname, the underlying field is called “FieldNames”
The actual code
With this knowledge, we can create a model for our compontent that based on the ASP.NET component binding and the attributes from the Sitecore ASP.NET SDK will bring this together.
When inserting a component in Sitecore the information needed for the actual rendering consists of:
-
The datasource with its fields and childitems defining the actual data. The datasource can be reusing in other components eg. to present the same data on other pages.
-
the component parameters defining behavior in this specific instance. The fields are defined on the Rendering Parameter Template, but the values are serialzed and stored in the layout delta for the page. The information includes eg. styling configuration on the specific - and the selected rendering variant
In Next.JS it is just the raw data from the layout source that is used in the components, so it is a matter of accessing the values from fields and params object. Often you will also need to access other data from the layout response by accessing the sitecoreContext either with the High Order Component function withSitecoreContext() or by calling useSitecoreContext()
In ASP.NET it is in the core nature to work with strong types and the Sitecore ASP.NET SDK embraces this perfectly. So while the raw object can be accessed through the ISitecoreRenderingContext we can with ASP.NET ModelBinding define the model of the combined properties that is necessary for this specific component.
|
|
The SDK provides attributes hooked up with the native ASP.NET ModelBinding. The common attributes are:
-
SitecoreComponentFieldprobably the most frequently used, use this to get value from a field of the datasource, in thefieldsobject in the layout response. If there is no data source, it -
SitecoreComponentPropertyuse this to get one of the very few properties at the component root itself in the layout response -
SitecoreComponentParameteruse this to get a value from the rendering parameter, theparamsobject in the layout response -
SitecoreContextPropertyuse this to get one of the few properties at the root sitecore context object such as pageEditing, language, itemPath, site
There is also SitecoreRouteField to get a field of the context page itself. All the attributes are listed in the API reference6 and with the documentation for the ASP.NET Core SDK the model binding concept is explained with an example7
Now we will just use the value in a ViewComponent to return the corresponding view. This can be as simple as:
|
|
While the ViewComponent can be placed in any structure, so you can make something meaningfull, the view have to be placed in /Views/Shared/Components/[ViewComponentName]/[ViewName].cshtml
I like to give the ViewComponent a name that allows us to create a bit more structure, not to reinvent Helix, but at least some grouping that makes the code base easy to read and understand and come as close to vertical slicing as possible.
There is no automatic generation like the componentBuilder in JSS SDK - and I take that as a feature and notice that with Content SDK it is now also supported to disable the generation of this file. Instead you add a single line for the options of the Sitecore SDK RenderingEngine:
|
|
If you don’t have any logic at all, but pure rendering of the mapped data, you might consider using the ModelBoundView in SitecoreComponent that allows you to register a model and just add a .cshtml razor view.
Then your registration would be
|
|
With this registration the view must be in Views/Shared/SitecoreComponent/JbDemo/CustomComponent/Default.cshtml.
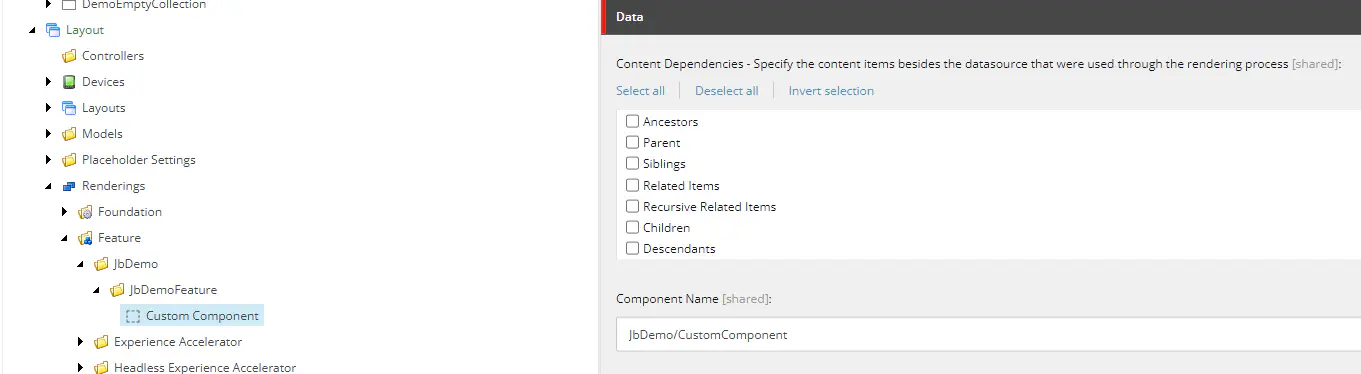
Here I reused the CustomComponentViewComponent.ViewComponentName constant which is the identifier for the component in the layoutservice, it is stored as ComponentName on the rendering item in Sitecore.
When using the model bound view you will need to handle the rendering variants in that view either by importing another partial view.
@model CustomComponentModel

<div class="component">
    @await Html.PartialAsync($"./{Model.RenderingVariantName}.cshtml", Model)
</div>
but it might also be that for your specific scenario it make sense to toggle individual html elements/features, eg. only rendering the long description for certain rendering variants, skip the image for certain ones, etc. Just like when building your React component in JSS. It comes back to good old software disciple - make something that has high cohesion and low coupling and avoid repeating yourself (unnecessary).